
Overview
Zift PRM allows you to leverage your Partner data to send communication of particular interest or relevance to specific sets of Partner users.
The Email Marketing tool allows you to create, edit and send users email blasts.
Before You Begin
- Log into PRM Admin with CommTask Level 1 rights or greater.
- Ensure that the communication ZIP file has been created. The top level of the ZIP file should contain a well-constructed html file with the
htmfile extension. There should also be a sub folder that contains all of the supporting assets such as images and the Cascading Stylesheet (.css) file. This folder must not have any sub folders. Files in the resource folder should be referenced using relative paths. - Ensure that a selection list exists.
- Ensure that the users have opted in to the relevant email communication categories.
How to Create Email Marketing Communication
- Navigate to Communication > Email Marketing.
- Select New Communication in the menu bar.

- Enter the values required for the Setup tab.
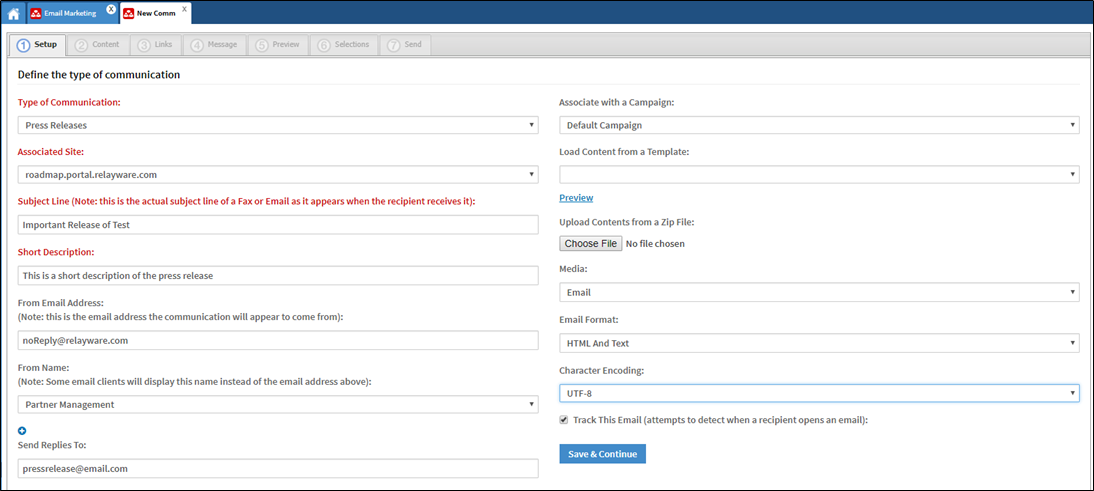
For more information regarding the fields, view the table. - Click Save & Continue.
- In the Content tab, use the editor to modify the current layout of the email. The email can be saved as template for future reuse.
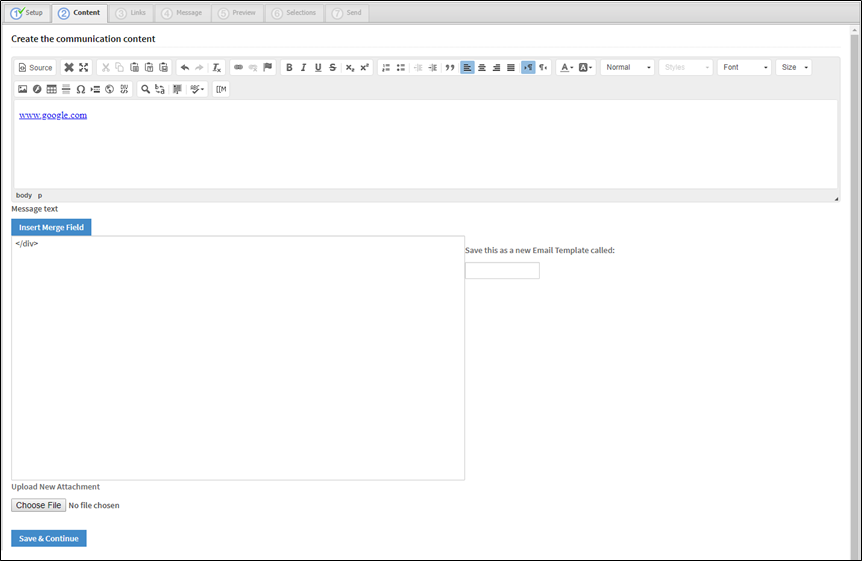
- Click Save & Continue.
- In the Links tab, each link included in the content is displayed. Review the links to ensure the link text and destination URL are correct.

- In the Message tab, a message can be added to appear in the user’s Activity Stream to alert them to the email message. If you opt not to send a message to the Activity Stream, select the Do not send message option.

- Click Save & Continue.
- In the Preview tab, the Activity Screen message and the email can be viewed as they will appear to the user. Edits can be made by clicking on the appropriate tab.
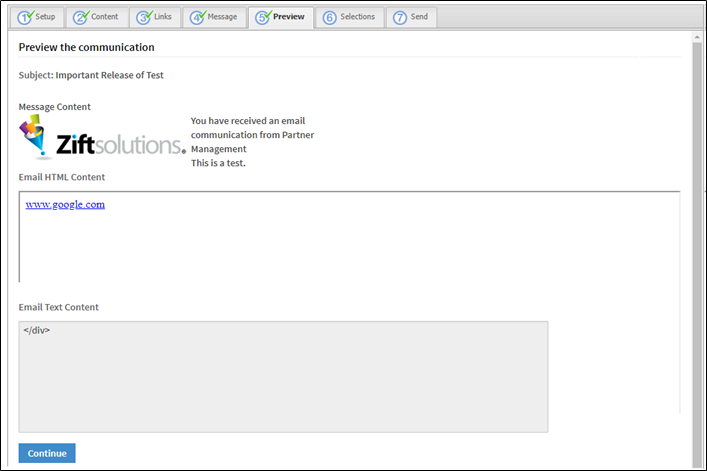
- Click Continue.
- In the Selections tab, select which users will receive the communication. There are options to include and exclude users.
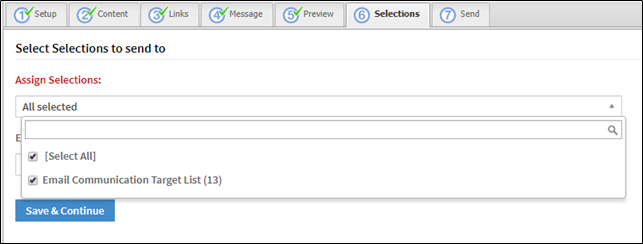
- Click Save & Continue.
- In the Send tab, a test email can be sent. Left click on the Action button to:
View Selection: a list of all the users who are currently included in the selected list is displayed.
Or
Send Now: the email will be sent and a confirmation message will appear.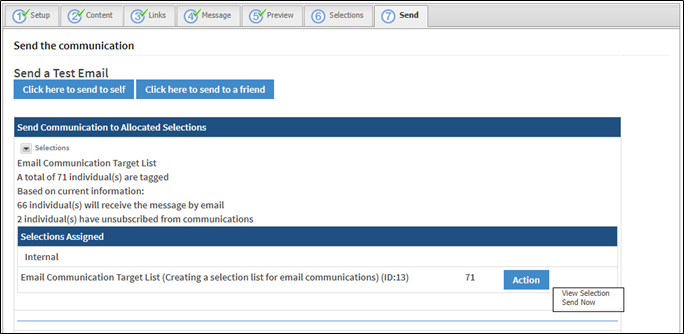
- Once an email is sent, the Statistics tab appears. If you chose to track the email on the Setup tab, the tracking information is displayed here. The emails can be sent As Tests, Internally or Externally by selecting the relevant option from the drop-down list in the top right corner.

- To view more detail, click on the colored number.

Field descriptions
| Label |
Description |
|
Type of Communication |
Select the type of communication you want to create. The options available are:
|
|
Associated Site |
The site the communication is linked back to. |
|
Subject Line |
The text that appears as the subject of the email. |
|
Short Description |
A brief description of the communication. |
|
From Email Address |
The address that the email will appear to be from. A default address is provided – this can be edited. |
|
From Name |
An alternate name that some email software displays instead of the From Email Address. |
|
Send Replies to |
The address that any replies to the communication should be routed to. |
|
Associate with a Campaign |
If appropriate, select the Campaign that the communication relates to. |
|
Load Content from a Template |
If a template is being used for the communication, select the appropriate template. |
|
Upload Contents from a Zip File |
Select a zip file that contains all the assets to include in the email (images, text, etc.) |
|
Media |
Select one of the media options available. |
|
Email Format |
Select the appropriate option for the communication. The options available are:
|
|
Character Encoding |
Select the character encoding to be applied when parsing the communication. The options available are:
|
|
Track this email |
Select this option to enable tracking metrics to be collected from the communication. |
Comments
0 comments
Please sign in to leave a comment.