
Overview
Relaytags are ready-made widgets located on the WYSIWYG editor of a portal page, which enables you to quickly and easily add a wide variety of functionality to the pages of your Partner Portal. Relaytags can be used to display files and media resources, link to training courses, or enable a partner to monitor the progress of their opportunities. This article describes how to use the RELAY_PARTNER_REGISTRATION Relaytag. The instructions below assume that you have previously created the page you wish to add the Relaytag to.
Best Practice for Relaytags
While you can use more than one Relaytag on a single page, we recommend that you only do so if the Relaytags are querying different data. Interference and unexpected behavior may result if two Relaytags on a single page attempt to access the same data.
Before You Begin
- Log in to the PRM Admin site with elementTask level 2 rights or greater.
- You will need the user level permission to Add a Phrase and the appropriate language rights.
- How to Add a Relaytag to a Partner Portal Page.
Partner Portal Result
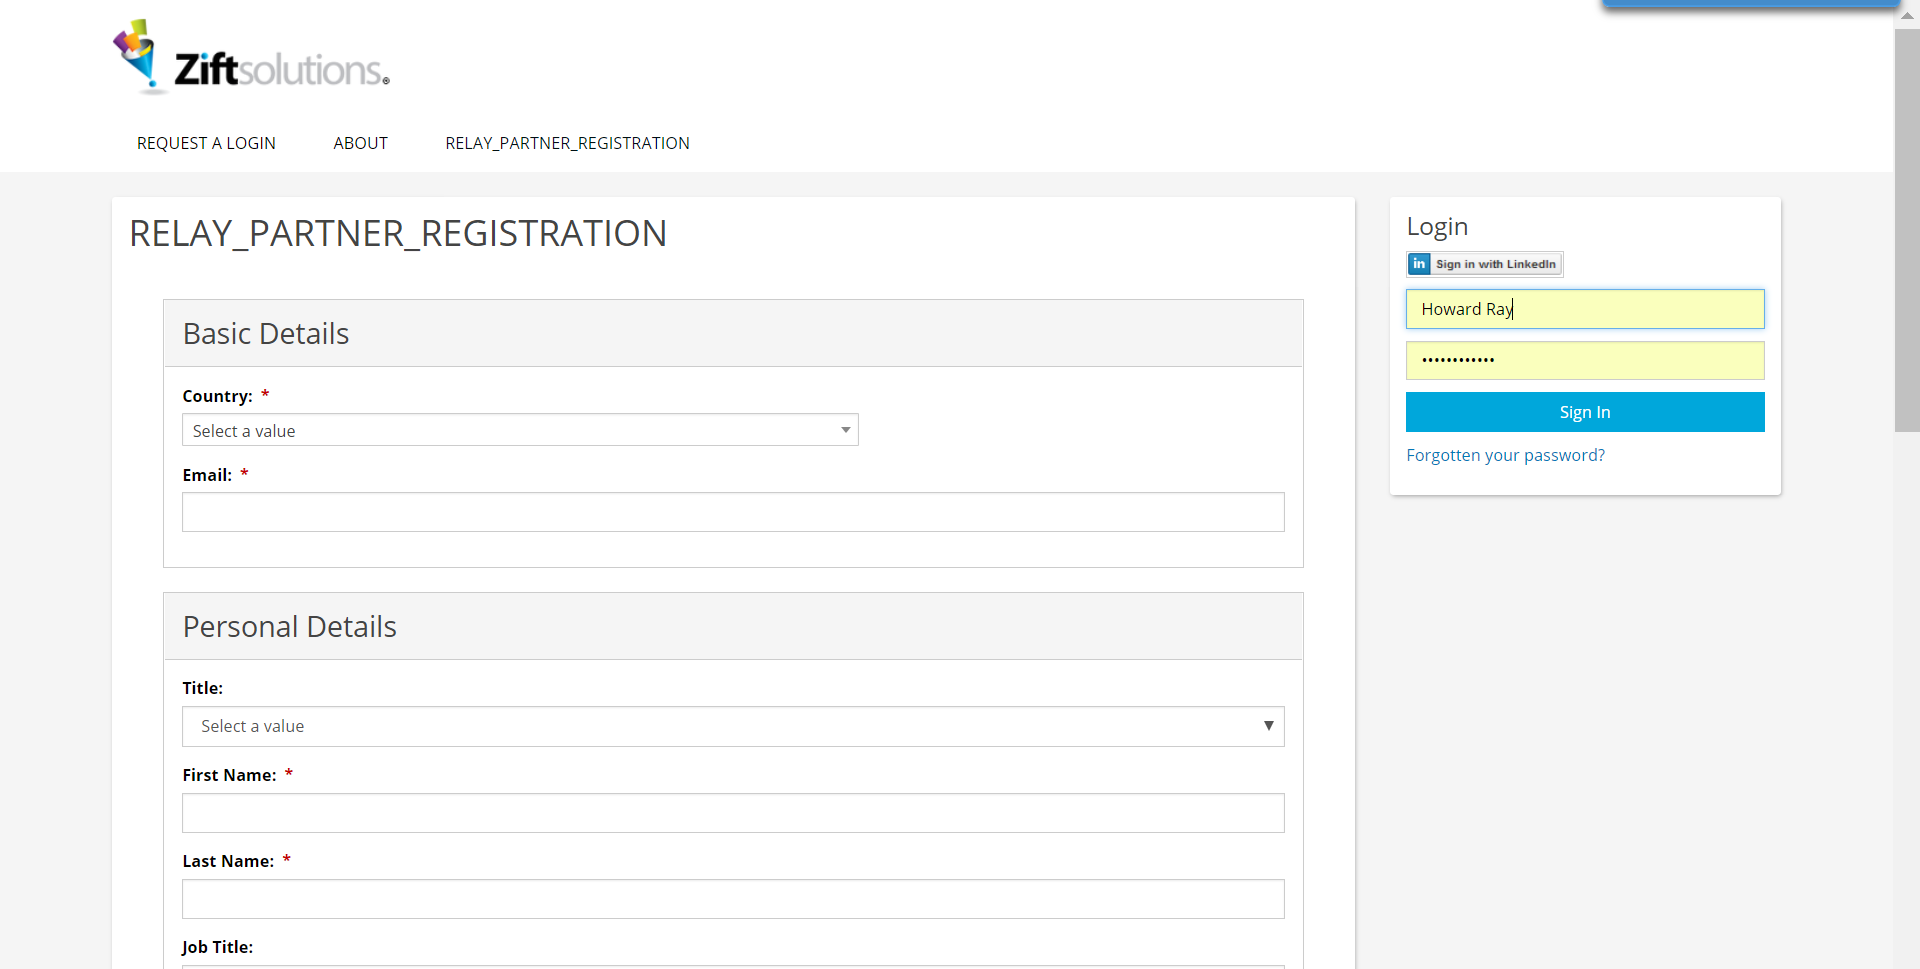
This is an example of the Relaytag displayed in the Partner Portal. You can customize the results using the parameters below.
Figure: Portal page displaying RELAY_PARTNER_REGISTRATION Relaytag as it will appear on the Partner Portal.
Relaytag Configuration
The RELAY_PARTNER_REGISTRATION Relaytag allows you to display a registration form for prospective Partners, typically on a page in the Logged-Out folder of your Partner Portal.
It does not accept any parameters.
You can add this Relaytag to a Portal page using the procedure described here.
Sample definition
{{RELAY_PARTNER_REGISTRATION}}
Comments
0 comments
Please sign in to leave a comment.